
Previous Post - Introduction to Azure Functions
Step 1 – Login in to the Azure Portal, URL - "https://portal.azure.com/"

Step 2 - Click on "Create Resource".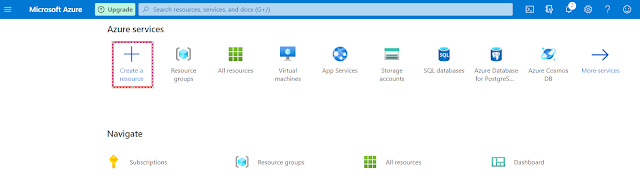

Step 3 – Click on "Function App".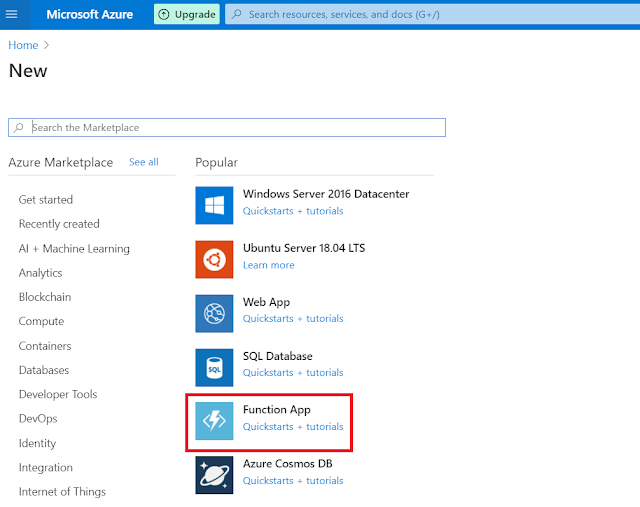

Step 4 – Fill all the information and click on "Review+Create" button.

Step 5 – Click on the "Create" button.

Step 6 – Click on the "Go to resource" button.

Step 7 – Click on the "Functions".

Step 8 – Click on the "Add" button and select "HTTP
trigger".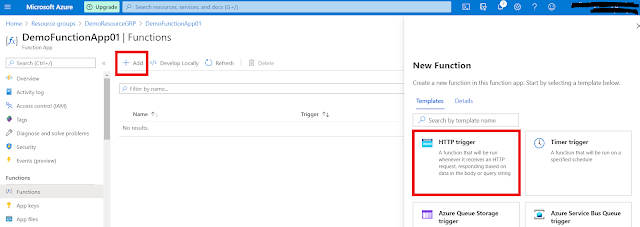

Step 9 – Name Azure Function and click "Create Function" button.

Step 10 – Click on the "Refresh" button and go to function by clicking on its name.

Step 11 – Click on the "Code + Test".

Step 12 – Now to test Azure Function, click on the "Test/Run" button.

Step 13 – Click on the "Run" button.

Step 14 – Whooooo!! We did it. 😊

Step 15 – Click on the "Get function URL".

Step 16 – Copy "END POINT URL" for further use.

NOTE- Only .Net Core run time stack can be used while making Azure Function from Azure Portal.
Lets jump on to Part 2 - Create Azure Function using Visual Studio.
Reference to MS Documentation -
https://docs.microsoft.com/en-us/azure/azure-functions/
Happy Learning, LET'S SHARE !


No comments:
Post a Comment