Power
Automate
Power
Automate, earlier known as Microsoft Flow has multiple connectors
that perform some Actions on some Events. The combination of connectors
used to create Automated Workflows.
Connector
is the tool to connect two external Applications
together.
Example-
When creating any record in MS Dynamics 365, insert same record into SQL Database.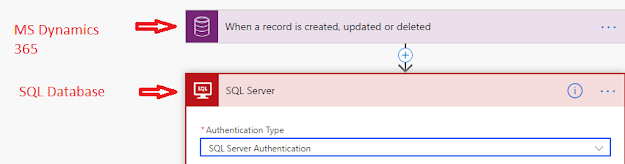
MS Dynamics 365 and SQL Database are two different Applications.
Event can be Create of Record, Update of Record, Delete of Record and etc.
Action can be Create of Record, Retrieve of Record and etc.
Scenario-
A requirement states that we need to call
an external API that return some response.
This API will be triggered on create of a record in Dynamics 365 and returned
response will be updated back to that particular record.
Solution-
We can make External Http Request using Power Automate Connectors.
Step 2 – Go to the Solutions, Open the solution and create a new Flow.
After clicking solutions, we will find the
same solutions list that we had made in our Dynamics 365 environment. We need
to open any solution and create a flow under that solution just like any other
component i.e. Entity, Fields, Web
resources etc.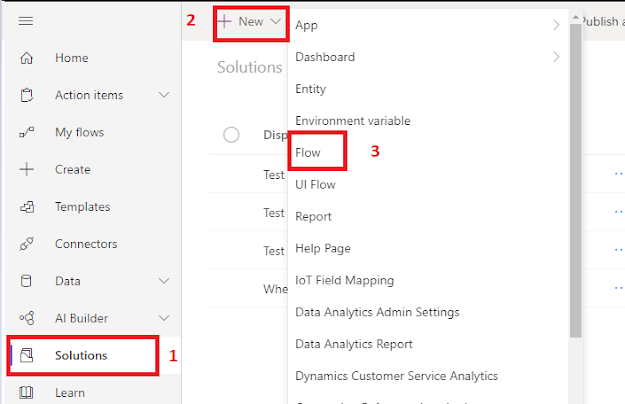
Step
3 – Search for Common Data Service
Connector.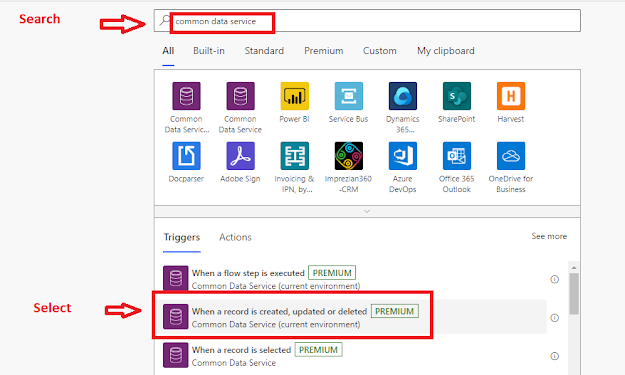
Note: Do not use Dynamics 365 connectors as they are deprecated now.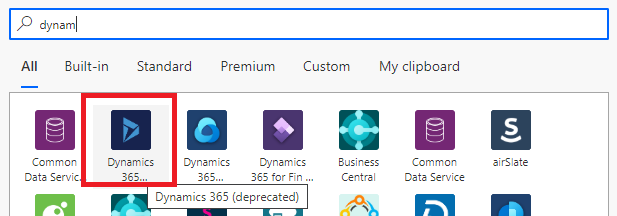
Step 4 – Select Trigger
condition and Entity name and
then click on +New step.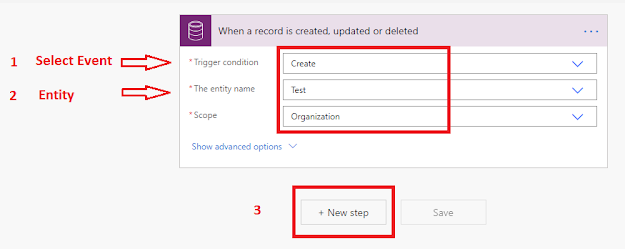
Step 5 – Search for HTTP.
Http is used to call API Endpoint by
sending Request.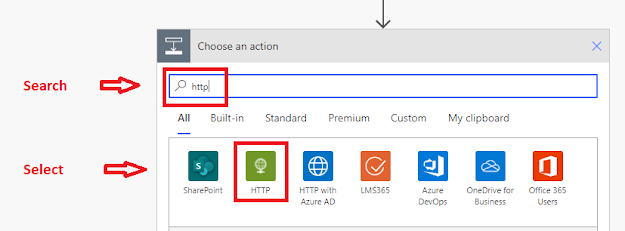
Step 6 – Follow as per below.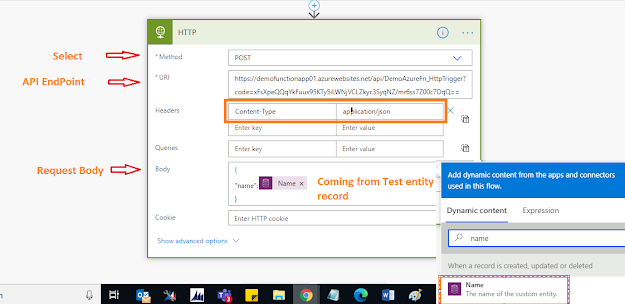
Step 7 – Click on +New
Step to add another connector and search for Initialize.
Initialize
is the connector used to contain the Response from
HTTP connector (which sends HTTP Request and receive Response back).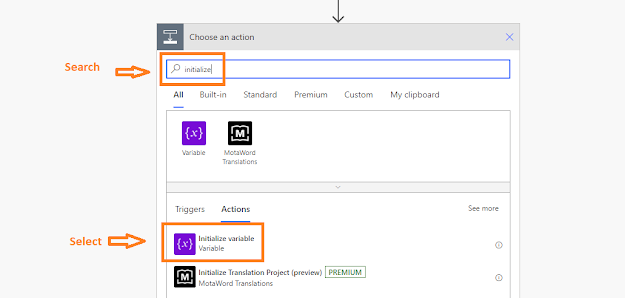
Step 8 – Follow as per below.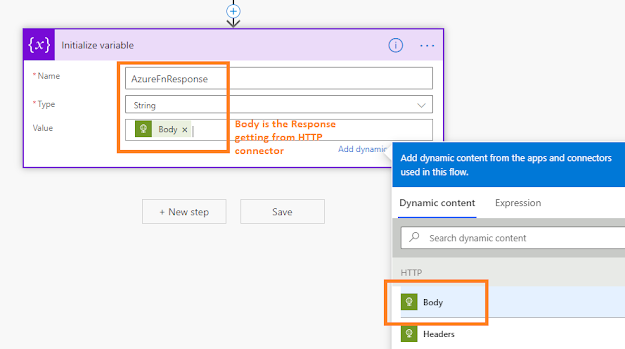
This variable containing Response will be used to update the Dynamics 365 record of Test Entity.
Step 9 - Click on +New
Step to add another connector and search for Common Data Service.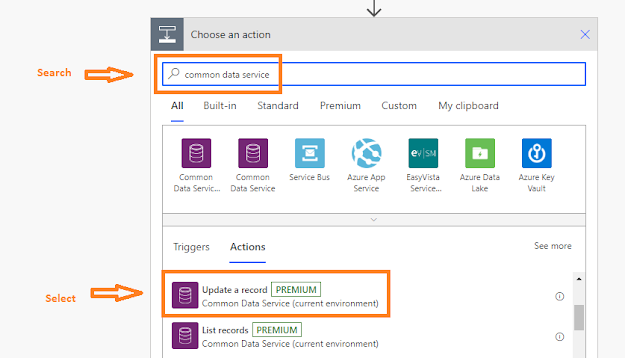
Step 10 – Follow as per below and Click Show advanced options.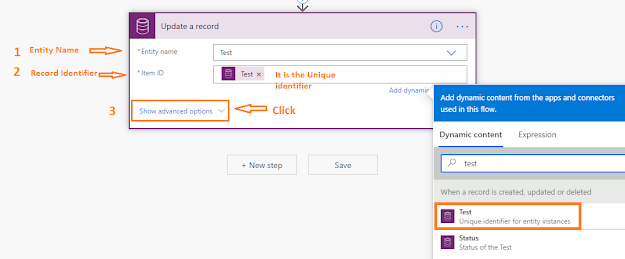
The Unique identifier is like GUID.
Example -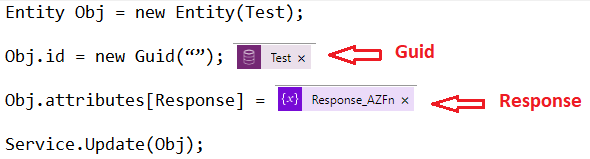
Step 11 – Follow as per below and Save the flow.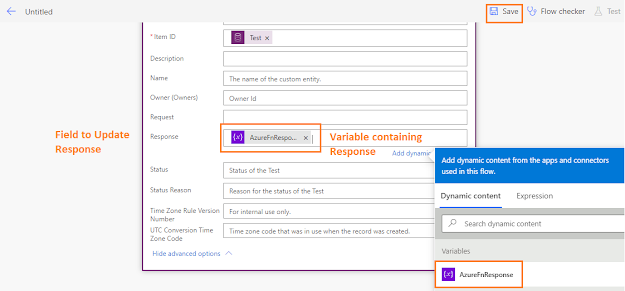
After saving the flow, it will look like-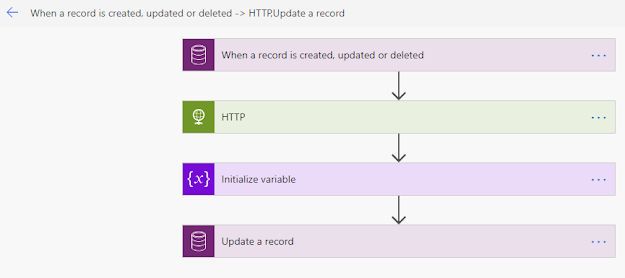
Step 12 – Now go to the Test Entity and create a New Record.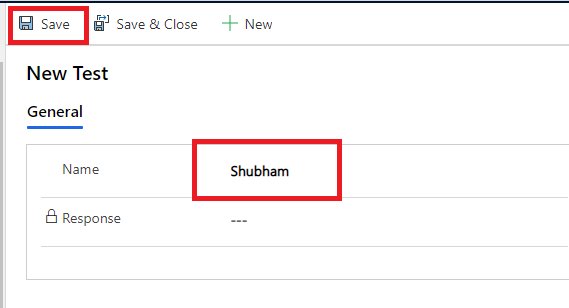
Step 13 – Save the
form and reload it.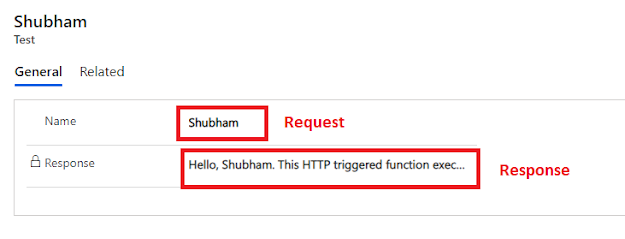
Hurrraayyyyy! We did it :)
We ran our flow successfully. To see the
flow run, go the solution where we had made a Flow and open it.
We will find the history of Flow runs.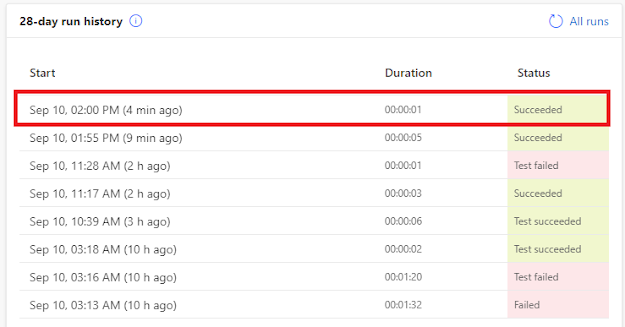
After opening the above flow run history, we
will find a successful execution of each connector.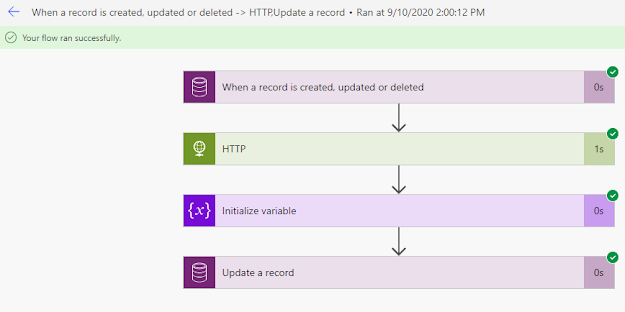
Happy Learning, LET'S SHARE !


